Appearance
Assign work to resources
After setting up your project schedule, you can assign resources to the various designations on your projects.
TIP
You can also assign resources to designations before adding hours on the schedule. This enables you to see how many hours you can add for a specific employee, since the schedule view will then warn when you have exceeded their capacity.
Understand the resources view
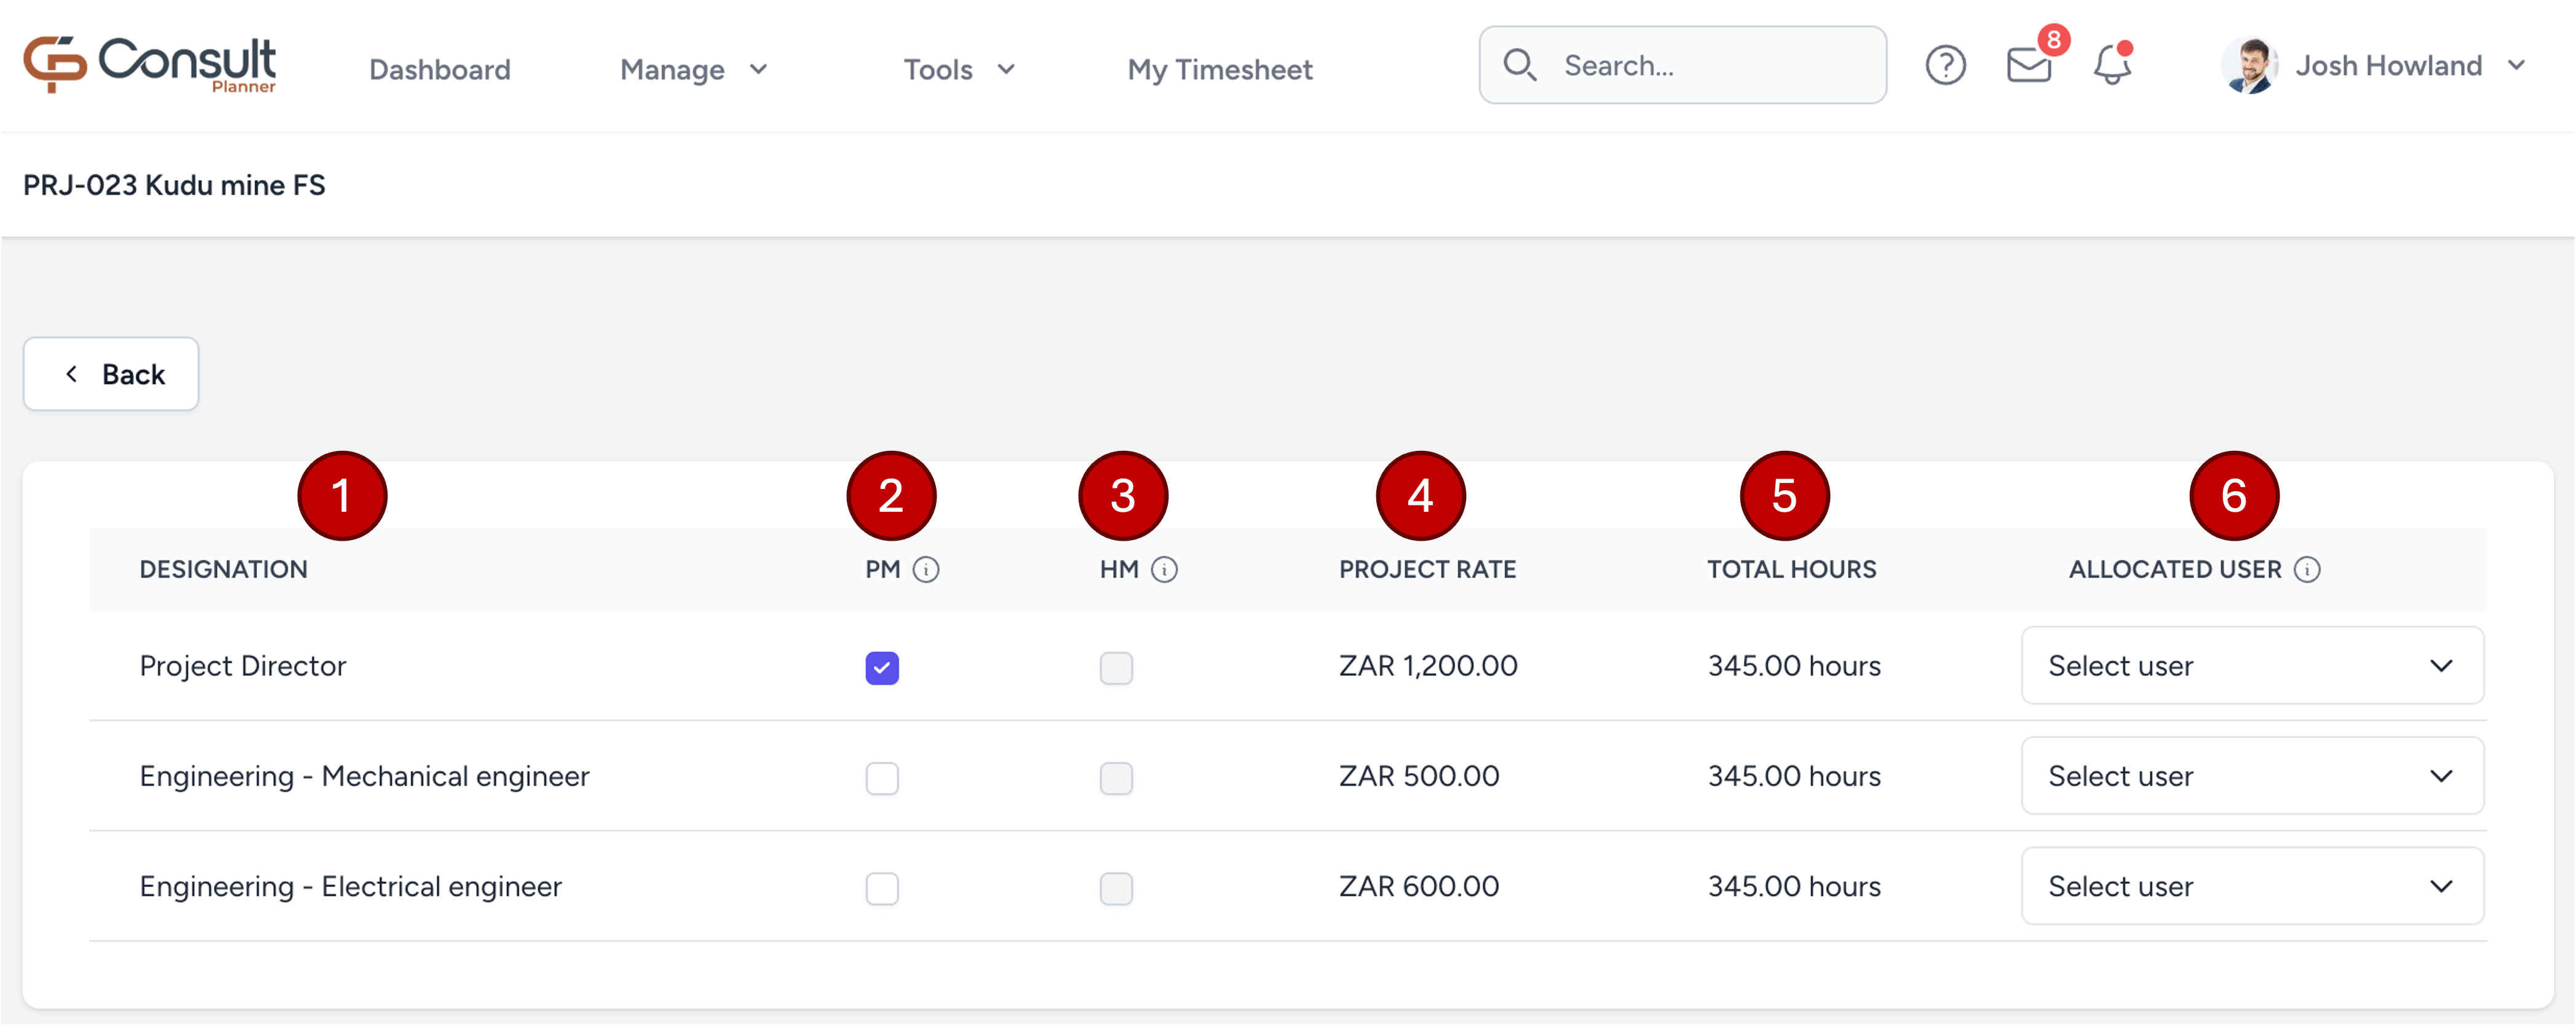
The columns of the resource table (numbered above) are explained below:
- Designation: The name of the designation, as specified in the project organogram during the project set up.
- PM: A checkbox that enables a user to perform the role of a PM on this project. Selecting this checkbox brings up the following three options:
- Project Manager: Reflects the selection of the parent checkbox.
- View Financials: If checked, the user will be able to view financial information on the project (such as rates) and access potentially sensitive project documents uploaded in the Documents tab.
- Email notifications: Determines whether the PM should receive project notifications via email. This is useful when, for example, a project director delegated all PM responsibilities to another user and doesn't want to receive the email updates since it already goes to the delegated PM.
- HM: This is an acronym for "Hours Management", and when enabled it acts as a safety mechanism to prevent resources from capturing more hours on a project than what has been allocated to them. This is especially helpful, for example, when there are contractors working on a project that should only work a fixed number of hours and should communicate with the PM before being able to log more hours.
- Project rate: The charge out rate for this designation for this project. This includes any discounts as configured in the organogram.
- Total hours: The total number of hours allocated for this designation for this project.
- Allocated user: The user allocated to this designation (see next section).
Assign users to project roles
Consult assists PMs by giving them a quick indicator regarding the availability of users to fulfil certain roles.
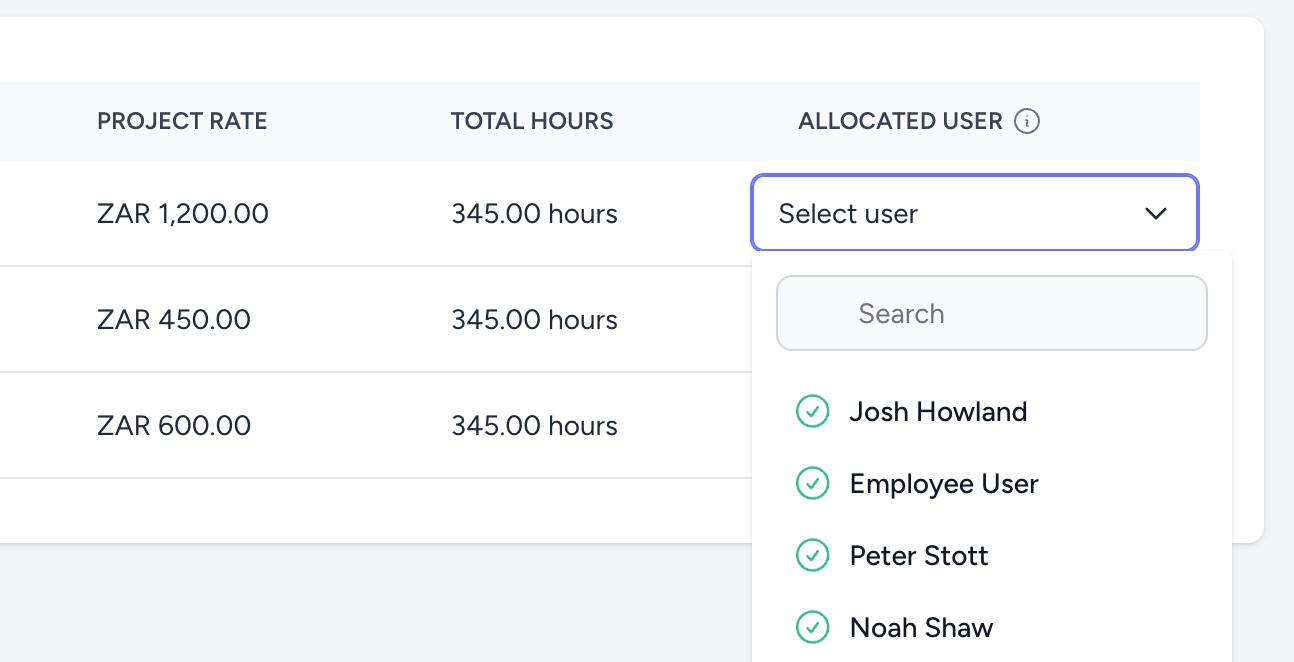
Available users
As shown below, a green checkmark indicates that these users have the required number of hours for the selected role:
Users with conflicts
When a user has a red cross, that user does not have enough capacity to work on this project given their current schedule. You can still select that user, which will kick off a request to their resource manager to review the request and approve or reject it.
TIP
Find out who the user's resource manager is using the company organogram and notify them of the request, providing context as to why they are needed on this project. This communication can speed up the process of getting them approved.
The user's resource manager has the ability to move their hours around to ensure they have the capacity for this project.
Allocate time to resources
The Schedule interface allows project managers to plan, fill, and import weekly hours for project resources. This guide explains the different ways users can allocate time.
From the project overview page, open the interface by selecting Schedule in the side navigation bar
Fill weekly hours
Use the Fill Hours functionality to assign hours to multiple resources for a designated set of weeks:
- Click Actions > Fill Hours.
- In the Fill weekly hours modal:
- Select Resources: Choose specific resources to populate. Leave blank to fill all.
- Select Months: Optional. Apply to selected months; leave blank to fill all future/current months.
- Enter Hours: Specify how many hours should be worked per week.
- Click Fill hours to apply.
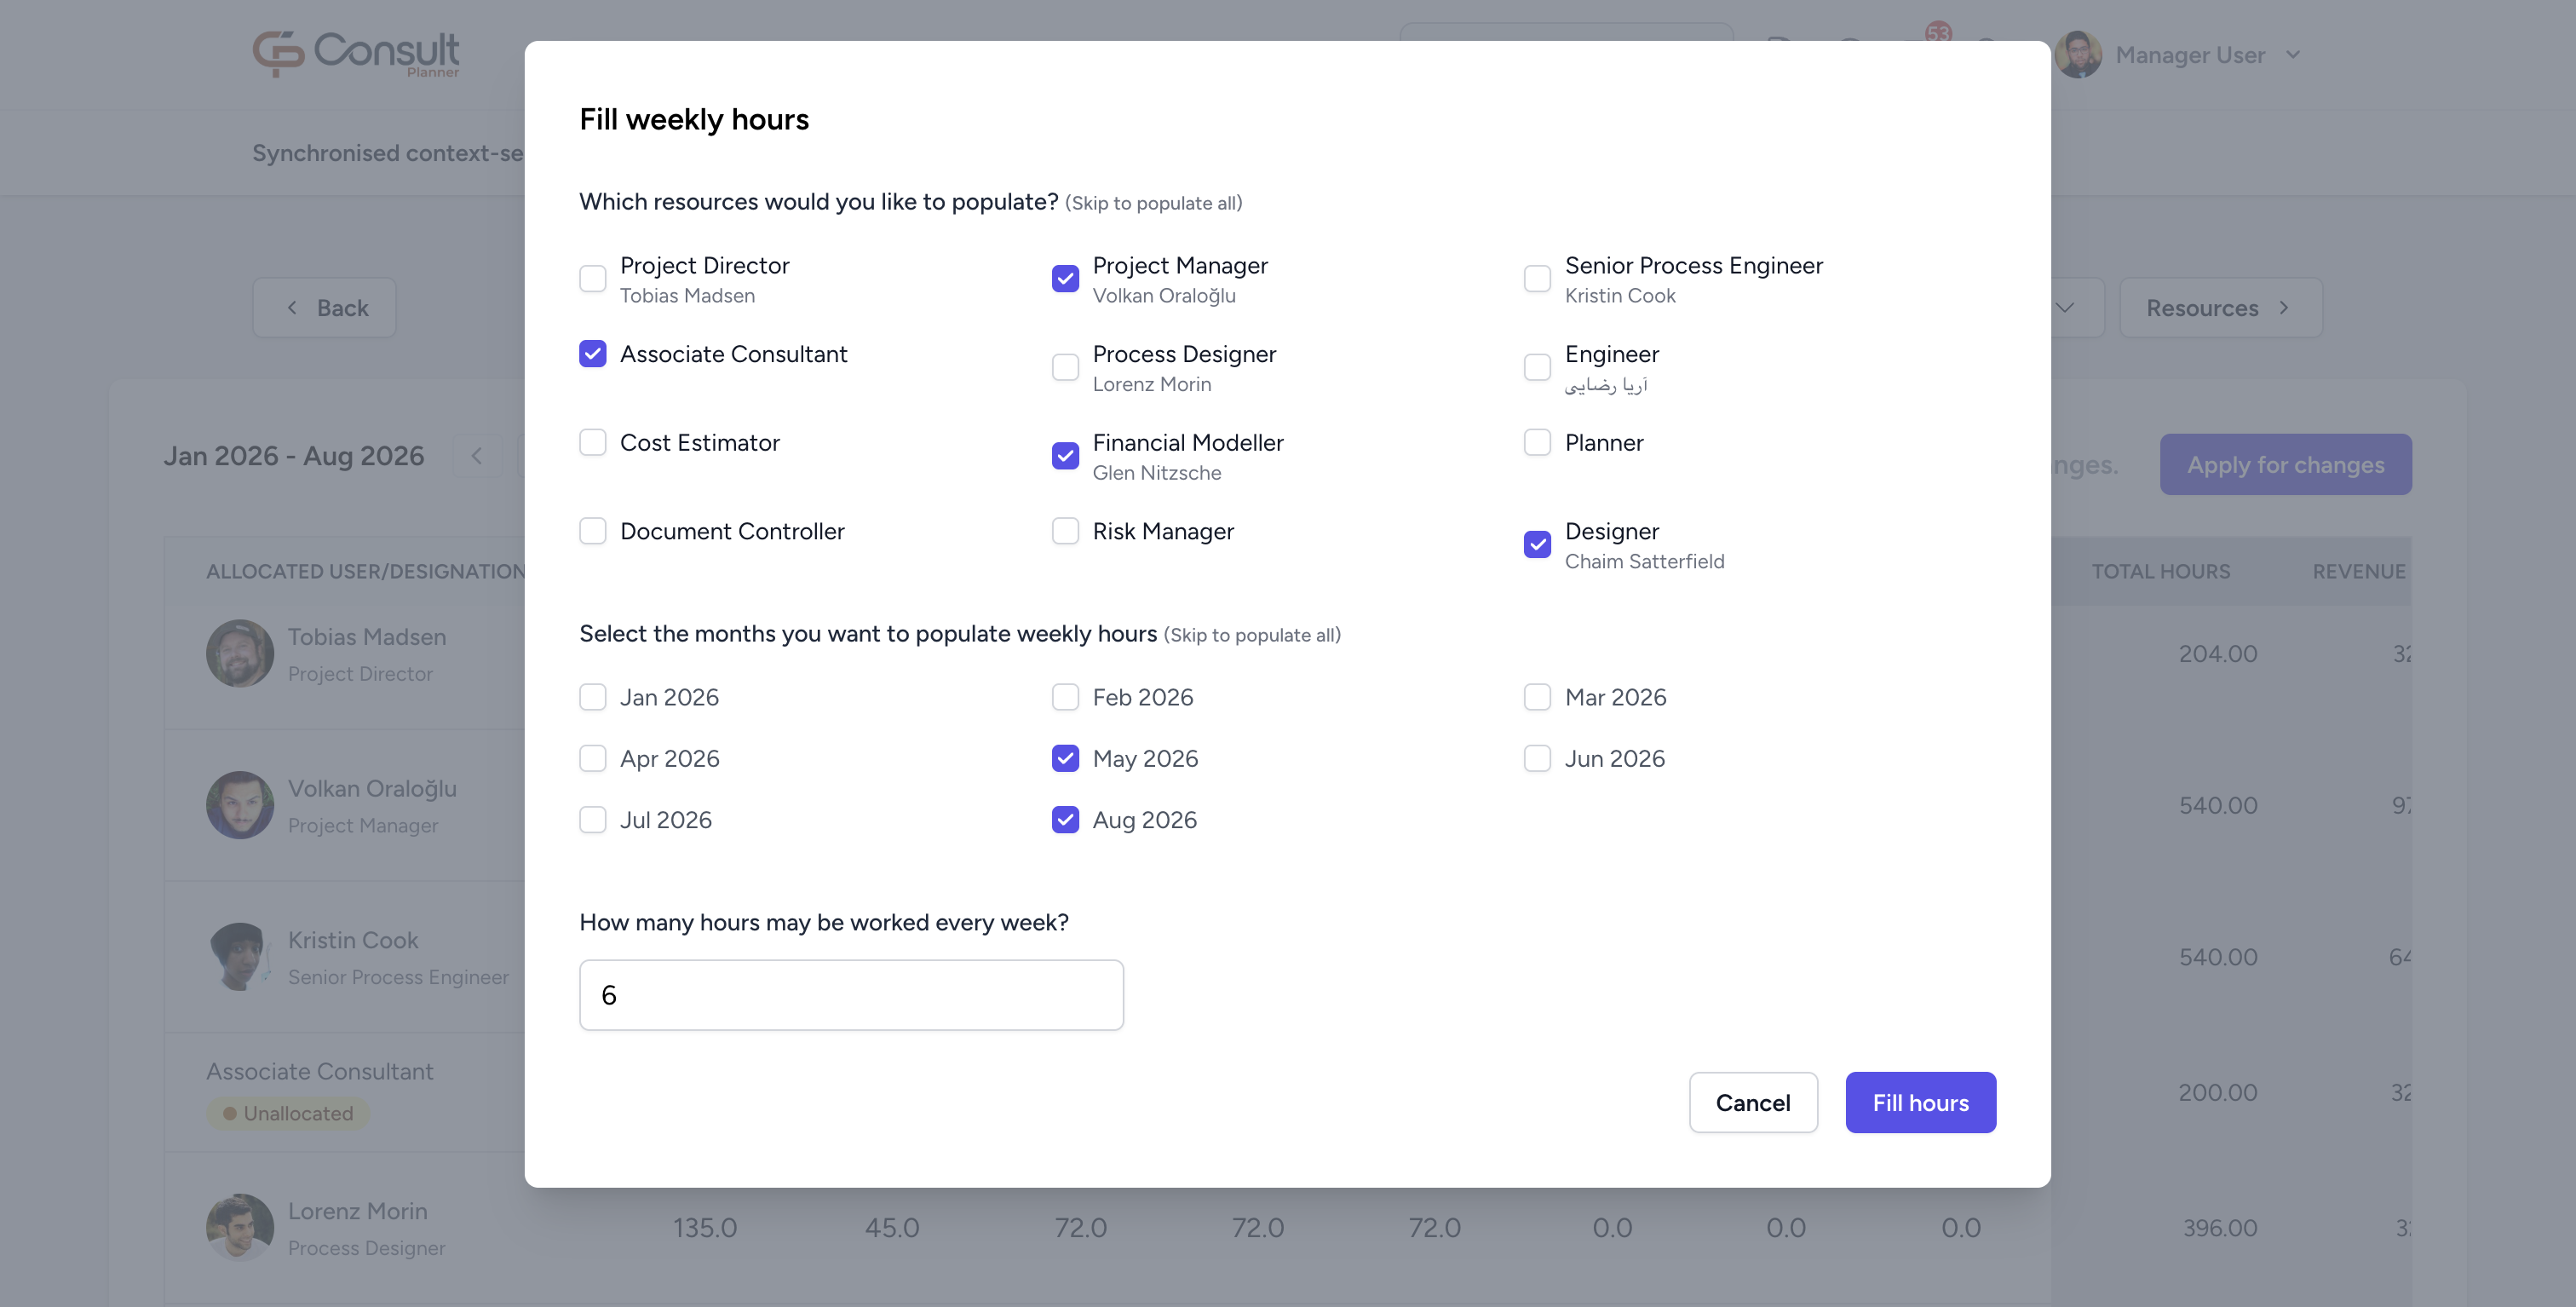
If any selected resource has hours pending approval, a warning will appear. Confirm to override pending approvals.
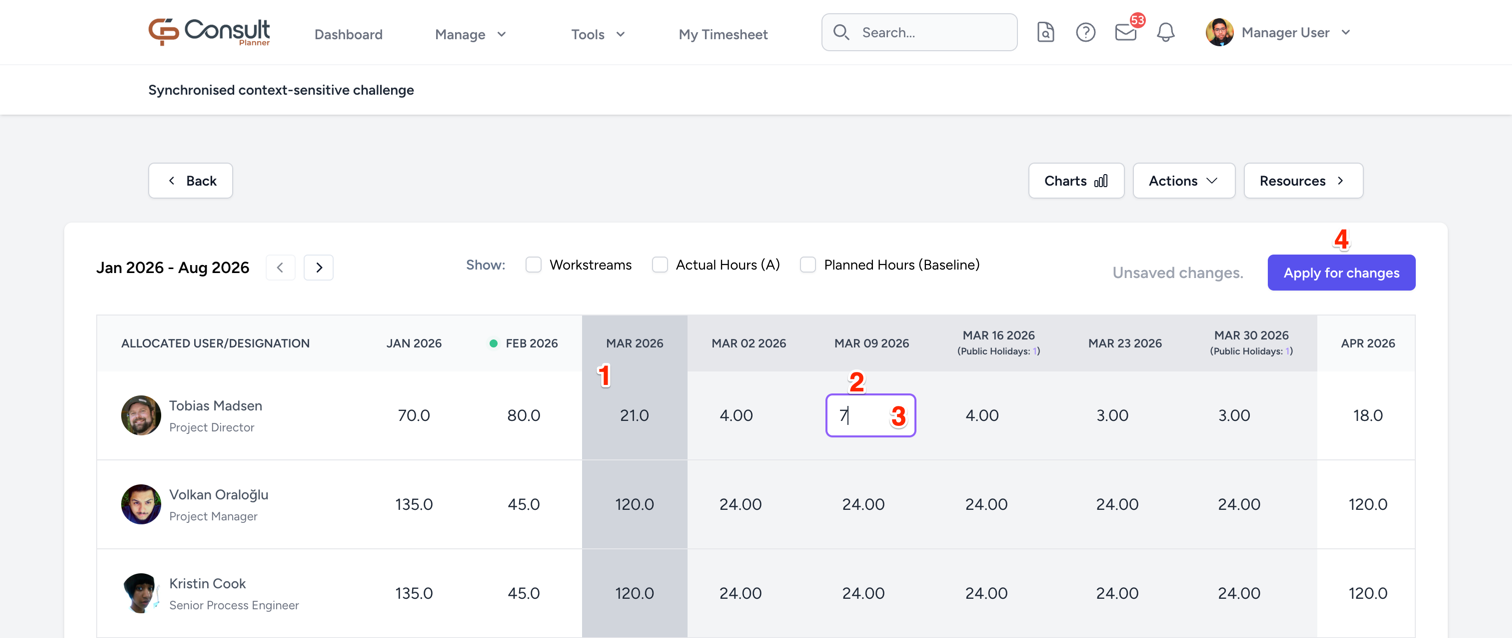
Edit weekly hours directly
- Click on the month to see the weekly schedule.
- Click on a cell corresponding to a resource and the week you want to edit.
- Enter the desired planned hours.
- Click the Apply for changes button to commit changes.
Import hours
To import schedules from a file:
- Click Actions > Import Schedule.
- In the Import Schedule modal:
- Granularity: Choose Weekly or Monthly.
- Override Actual Hours: If enabled, imported hours will overwrite actual hours.
- File: Select a .csv or .xlsx file.
- Click Import to apply.
WBS 1 projects: Assign resources to deliverables
In WBS 1 projects, deliverables drive the structure.
- Each deliverable has its own planned hours.
- You assign resources to a deliverable, and then allocate hours to those resources within that deliverable.
- The schedule view is structured around deliverables first, then resources underneath them.
Create WBS 1 deliverables
- From the Schedule interface click on the Deliverables button in the top right corner.
- Click + New Deliverable to create a new deliverable.
- In the Add Deliverable modal, fill in the following details:
- Name: The name of the deliverable.
- Phase The phase this deliverable belongs to.
- Start Date: The start date of the deliverable.
- End Date: The end date of the deliverable.
- Code: A code to identify the deliverable.
- Order: The order of the deliverable in the phase.
- Click Create to save the deliverable.
Assign WBS 1 resources to a deliverable
- Go to Schedule.
- Locate the relevant deliverable.
- Click Manage Resources.
- In the Resources modal:
- Add Resources: Add resources to the deliverable by selecting them from the dropdown and clicking + Add Resource.
- Remove Resources: Remove resources from the table.
To allocate hours to a resource, visit Allocate time to resources
WBS 2 projects: Assign deliverables to resources
In WBS 2 projects, resources drive the structure.
- You assign deliverables to a resource.
- Each resource has a maximum allocation per deliverable.
- The schedule view is structured around resources first, then deliverables beneath them.
Create WBS 2 deliverables
- From the Schedule interface click on the Deliverables button in the top right corner.
- Click + New Deliverable to create a new deliverable.
- In the Add Deliverable modal, fill in the following details:
- Name: The name of the deliverable.
- Phase The phase this deliverable belongs to.
- Start Date: The start date of the deliverable.
- End Date: The end date of the deliverable.
- Code: A code to identify the deliverable.
- Order: The order of the deliverable in the phase.
- Click Create to save the deliverable.
Assign WBS 2 resources to a deliverable
- Go to Schedule.
- Locate the relevant resource.
- Click Manage Deliverables.
- In the Deliverables modal:
- Add Deliverable: Add deliverables to the resource by selecting them from the dropdown and clicking + Add Deliverable.
- Remove Deliverables: Remove deliverable from the table.
- Edit Deliverables: Edit the max hours allocated to a deliverable.
To allocate hours to a resource, visit Allocate time to resources