Appearance
Create an invoice
To see the invoice life-cycle, refer to this diagram.
Below is an example list of invoices for a project:

Create a new invoice
To create an invoice, complete the following steps:
On Consult, navigate to your project by going to Manage > Projects and selecting the applicable project.
In the left sidebar, click Invoices
Click + New Invoice.
Specify the From and To dates, then click Save.
Review the invoice details. On this page, you can do the following:
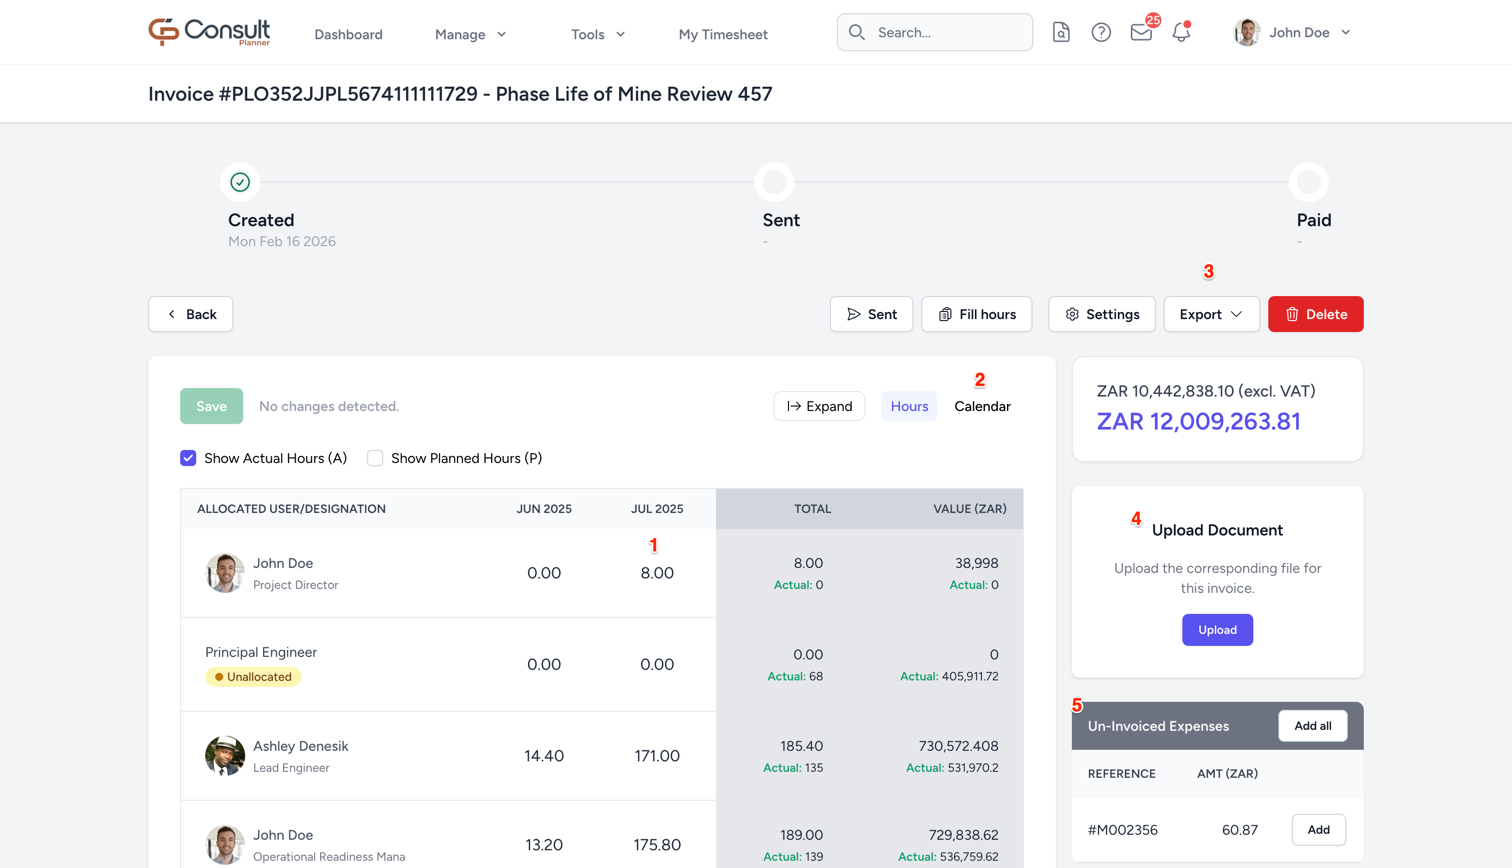
Change the billed/invoiced hours.
TIP
For the differences between the type of hours, refer to this page. You can use the Fill Hours functionality to easily align all the invoiced hours to a resource's actual hours.
Change the time period for the invoice. You can use the calendar view to see the start and end date for the invoice.
Export hours. Once you've saved the hours for the invoice, you can export it to Excel to incorporate it into your own invoice template.
Upload the invoice document. After you exported the Excel spreadsheet and created the invoice, you can import the invoice document to have it ready for reference later during the invoicing project.
Add expenses to invoice. Decide which expenses to add to the invoice by clicking Add. The expenses linked to your invoice will be underneath the hours in a section labelled Added Expenses.
INFO
For more information on expenses being pulled into invoices, refer to invoice calculation.
Once you have reviewed and confirmed the invoice details, click the Export button in the top-right corner of the invoice. From the dropdown menu, select Timesheet Report to download the data for your own invoice template, or select Expense Reports Summary to export all expenses that is included in the invoice.
After sending the invoice to the client, click Sent to update the invoice status on Consult.
When the invoice is paid, click Paid. If changes are needed, click Retract to edit the invoice accordingly.
INFO
You can set the Lock Hours flag on an invoice to prevent further timesheet capture within the invoiced period. This stops late timesheet entries from changing what has already been billed.
Export invoice to Xero
To export an invoice to Xero, complete the following steps:
- From the invoice view, go to Export > Export to Xero.
If this option is not available, please contact your administrator to connect to Xero.
- In the Export to Xero modal, review the information that will be used to create the invoice on Xero. If changes are needed to the information, they can be made on the modal itself or in the project settings.
- Click Send to Xero.
After the invoice has been successfully created, a button is added to the invoice page which opens the invoice directly in Xero: 
INFO
Please note that on your exported invoice, the Item and Project columns may appear blank if the corresponding items do not exist in your Xero account. To have these fields displayed on exported Consult invoices, add the items to your Xero account using matching item codes. 
Export invoice to QuickBooks
To export an invoice to QuickBooks, complete the following steps:
- From the invoice view, go to Export > Export to QuickBooks.
If this option is not available, please contact your administrator to connect to QuickBooks.
- In the Export to QuickBooks modal, review the information that will be used to create the invoice on QuickBooks. If changes are needed to the information, they can be made on the modal itself or in the project settings.
- Click Send to QuickBooks.
After the invoice has been successfully created, a button is added to the invoice page which opens the invoice directly in QuickBooks:
