
Configure admin settings
Configure global parameters for time tracking, leave, currencies, public holidays, custom fields, and integrations.
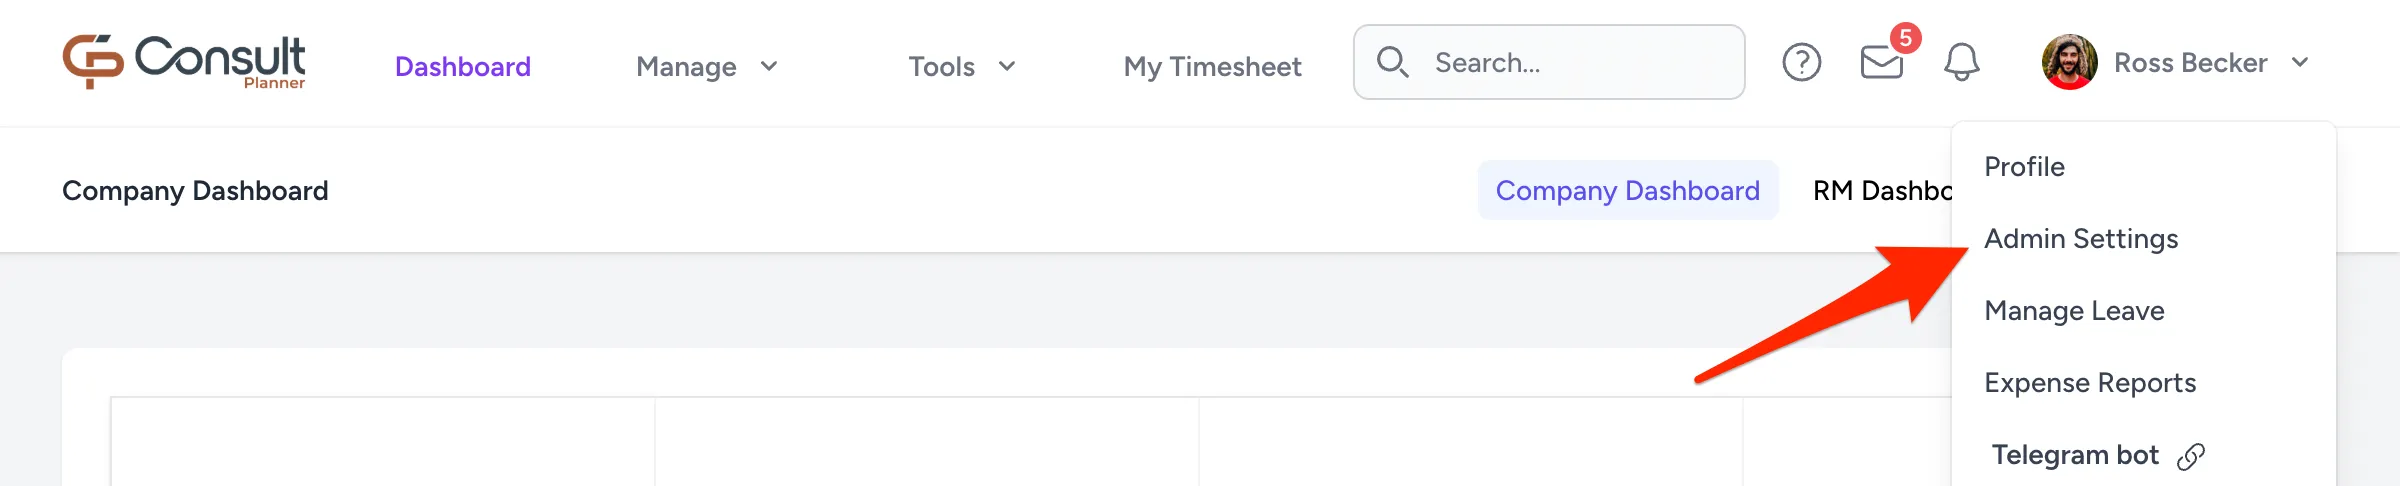
The admin settings page lets administrators configure key parameters for Consult features such as time tracking and leave applications. To open it, click your user profile icon in the top-right corner and select Admin Settings.
General
Configurations
Configure the global settings that affect how users and managers interact with timesheets and reporting:
- Daily Hours Required: The number of working hours required per day for employees. Once updated, timesheets that have not been submitted must meet the new hourly requirement before submission is allowed. It sets the hours a user is expected to work each week, which utilisation calculations and resource allocation both measure against.
- Max Weekly Hours: The maximum number of hours a user may be allocated or log per week. This is a separate, higher figure to what the organisation expects a user to work, and an allocation that goes over it is blocked rather than flagged. See approve resource requests for how the two figures are used together.
- Work at Risk Target: The organisation’s work at risk target. It was drawn on the work at risk chart of the previous dashboard, so it has no visible effect since the Company dashboard replaced it.
- Target Revenue: The organisation’s target revenue. It was drawn on the monthly income chart of the previous dashboard, so it likewise has no visible effect at present.
- Allow Overriding Actual Hours: Enables project managers to upload or import actual hours directly into timesheets. When enabled, imported actual hours replace manually captured hours for the same period. It applies to every project format, including both WBS structures.
- Timesheet Submission: Enables timesheet submission for users. When enabled, users must submit their timesheets for approval by their resource manager. Before activating this option, ensure that each user has a designated resource manager and that the process has been communicated to all users.
- Timesheet Overdue Reminder: The number of days after the last weekday of a week to email employees who have not submitted their timesheet for that week.
Enter
0to switch overdue reminders off. - Timesheet Overdue Escalation: The number of days after the employee reminder to email the employee’s resource managers, if the timesheet is still outstanding.
Enter
0to switch the escalation off. This field can only be set once Timesheet Overdue Reminder is greater than0, since employees are always reminded before their manager is involved.
Neither reminder is sent unless Timesheet Submission is enabled.
Setting the reminder to 3 days and the escalation to 2 days, for example, emails the employee on the Monday after the week closes and their resource managers on the Wednesday.
Employees who have no resource manager assigned are never escalated.
See overdue timesheet follow-up for the full follow-up behaviour, including who is left out of the reminders.
Warning: Enable Allow Overriding Actual Hours only when absolutely necessary, since changes to actual hours directly affect utilisation, billing, and project reporting.
Approval notifications
Consult provides standard notifications for users based on their roles. In some cases, certain notifications are required for specific users to support a company’s business processes. To enable this, Consult supports specifying custom recipients for the following notifications:
- Approved expenses, excluding training.
- Approved training.
- Approved leave.
Countries
Manage countries
Manage the list of countries where the organisation operates. Adding a country enables country-specific regions, public holidays, projects, and users to be created within Consult.
Currencies
Manage the currencies supported by the organisation.
Each currency includes the following fields:
- Currency: The currency code, such as
ZARorAUD. - Ex. rate: The conversion rate relative to the base currency.
- Tax acronym: The short label used to identify the tax applied to this currency, such as
VAT,GST, orSales Tax. It is displayed on invoices, expense reports, and financial summaries. - Tax percentage: The tax rate applied when calculating tax amounts for this currency, such as
15for 15%. It is used to automatically calculate tax on invoices, expenses, and other financial records. - Mileage rate: An optional rate used for mileage calculations.
The currencies added determine which options are available when creating projects and users. They are also used for financial records such as user rates, project rate cards, expense reports, and invoices. If a currency is not added, it is not available in workflows that require financial values.
Note: The exchange rate defines how much one unit of the base currency is worth in the selected currency. For example, if the base currency is ZAR and the exchange rate for AUD is
0.14, then1 ZAR = 0.14 AUD. Conversely,1 AUDis equal to approximately7.14 ZAR.
Country-specific settings
Country-specific configurations are based on the countries that have been added. Select a country from the dropdown to manage its settings:
- Regions: Define geographical regions within a country to enable region-specific public holidays.
- Export or import public holidays: Manage the public holidays for the selected country.
To update public holidays:
- Click Export/Import to download the current public holidays as an Excel file.
- Update the file as needed.
- Upload the updated file back to the app.
- Click Import to save the changes.
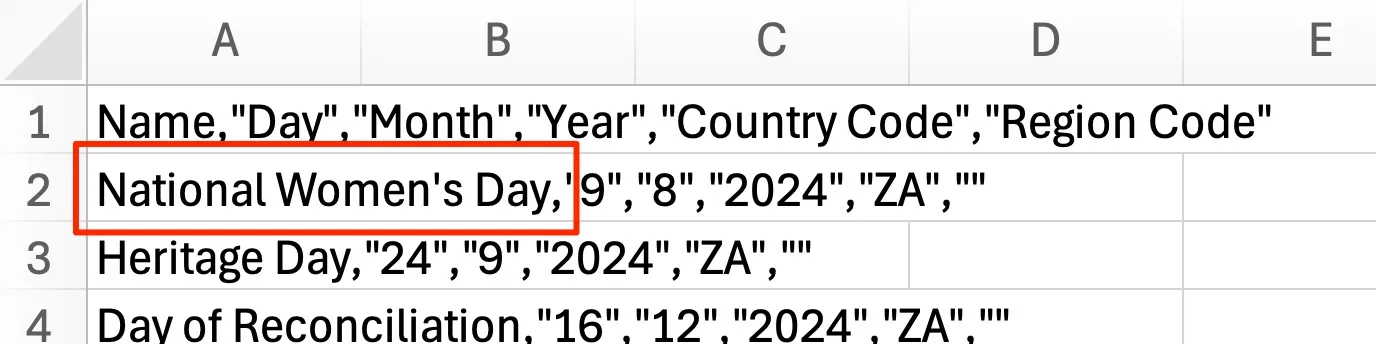
Note: If you get the warning “There was an error on row 2. The name field is required.”, it might be because you opened the file with Excel, which then automatically formatted the CSV contents. This can be confirmed by viewing the imported data, which will be missing the double quotation marks (
") around the first words:
In this case, open Excel first and then import the CSV data using the Data > Get Data > From Text tool. This approach retains the format of the CSV data, but you should still ensure that you save the file as a CSV.
Leave
The Manage Company Leave page lets administrators configure how each leave type behaves per country, including how balances are calculated, accrued, and reset. To open it, go to Admin Settings > Leave.
Note: Leave configuration is country-specific. Each country is managed independently, with no shared configuration across countries.
Each leave type falls into one of three categories:
General configuration rules
If a leave type is not configured, available days are not calculated or displayed. Although Unpaid Leave and Special Leave are not configurable and both belong to the “Other” category, the number of days taken by employees is still tracked.
Monthly accrual leave
Leave types in the “Monthly accrual” category automatically add the configured accrual amount at the start of each month.
Note: Each country has a default accrual amount of
1.75for annual leave.
A user only starts accruing once their start date has arrived, from the first monthly run on or after it. Where a user has no start date, the date their account was created is used instead. The first credit is the full monthly amount, even for someone who started partway through the previous month.
To configure a monthly accrual leave type:
- From the Manage Company Leave page, click the edit icon next to the leave type you want to configure. The Configure Leave view opens with the Name, Country, and Type fields pre-populated.
- Enter the following values:
- Accrual Amount: The number of days added to each user’s balance at the start of every month.
- Max Accrued Amount (Optional): The most the balance may build up to. Once a balance reaches it, accrual stops, and the month that takes the balance to the limit only adds what is needed to reach it. A balance that is already above the limit is not reduced. Leave it blank for no limit.
- Description: A brief description of the leave configuration.
- Click Save.
Note: Choosing Monthly Accrual from the Type dropdown resets Accrual Amount to
0and clears Max Accrued Amount (Optional), so re-enter both before saving.
Fixed value leave
Fixed value leave types allocate a predefined number of leave days to an employee for a specific period, for example over a year. The full allocation is granted at the start of the allocation period. Employees can use these days until the balance is exhausted or the allocation period expires.
A user’s first period runs from their start date, or from the date their account was created where they have no start date. When a period expires, Consult renews it overnight for the next period. Renewal stops once a user is deactivated, although the balance they already hold is kept.
Fixed value leave calculations for current and new users
For active users, balances are calculated by deducting previously approved leave from the total number of available days.
Note: This calculation considers the validity period that the user is currently in. For example, suppose the leave balance for sick leave is configured as 25 days over two years. If this configuration is made three years after a user is onboarded to Consult, then only the leave taken in the past year is deducted from the amount, since the first two years were part of the first validity period and are considered irrelevant to the current second validity period.
Configure fixed leave types
To configure a fixed leave type:
- From the Manage Company Leave page, click the edit icon next to the leave type you want to configure. The Name, Country, and Type fields are pre-populated.
- Enter the following values:
- Default Starting Value: The number of leave days allocated at the start of each validity period.
- Validity Duration (Months): The number of months the leave days remain valid.
- Description: A brief description of the leave configuration.
- Click Save.
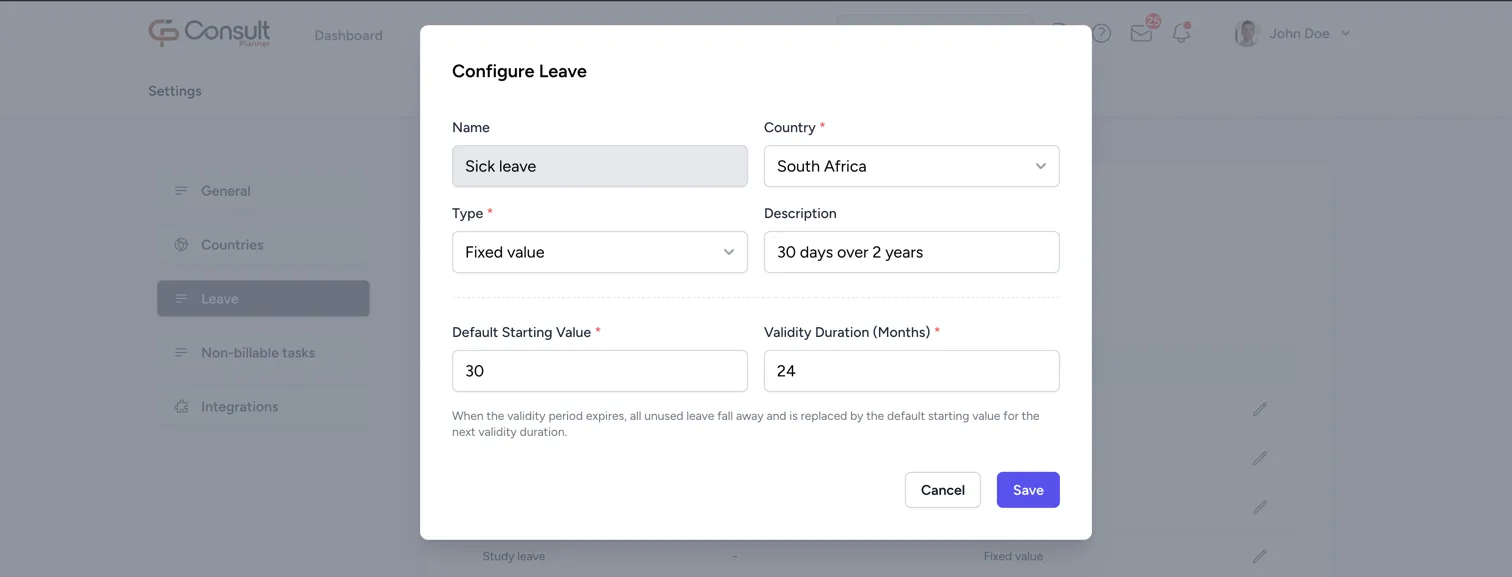
Note: If the fixed leave type has already been configured for the selected country, the Default Starting Value and Validity Duration are displayed in the Configure Leave view.
Other leave
“Other” leave types do not maintain balances and are not configurable. The leave days are recorded for visibility and reporting only. This currently applies to Unpaid Leave and Special Leave.
Non-billable tasks
Create and manage categories for non-billable tasks such as training or internal meetings. Once created, a category becomes available for all users on their timesheets, so they can log hours under it.
Note: If a category is deleted after hours have already been logged against it, those hours still appear under an unlinked category. To restore the original category, recreate it using the same name.
Custom fields
Custom fields capture information Consult does not hold by default, such as a client’s billing contact or a user’s employee number. To open the page, go to Admin Settings > Custom Fields.
Each field belongs to one kind of record, and the page has a card for each: Project Custom Fields, Client Custom Fields, and User Custom Fields. A field is shown on every record of its kind.
The types on offer depend on the kind of record:
| Type | Project | Client | User |
|---|---|---|---|
| Text | Yes | Yes | Yes |
| Date | Yes | Yes | Yes |
| Number | Yes | Yes | Yes |
| Decimal | Yes | Yes | Yes |
| Checkbox | Yes | Yes | Yes |
| Dropdown | No | Yes | Yes |
| Contact | No | Yes | No |
Create a custom field
To create a custom field:
- On the Custom Fields page, click New Custom Field on the card for the kind of record it belongs to.
- Complete the Create Custom Field modal:
- Name: Required. A name can only be used once per kind of record, so a client field and a user field can share a name.
- Type: One of the types the record supports, from the table above.
- Description: Optional, and shown as a tooltip next to the field on the record. It is limited to 250 characters; past the limit the field turns red, “The description cannot be longer than 250 characters.” is shown, and Create is disabled.
- Required: Whether the field must be completed on every record. It is not offered for Checkbox or Contact fields.
- Options: Dropdown fields only. Click Add Option for each choice; at least one is needed, and no two can be the same.
- Contact Details: Contact fields only. Tick the details to capture from Customer Name, Contact Person, Email Address, Phone Number, Mobile Number, Street Address, City, Postal Code, and Country, and tick Required beside any that must be completed.
- Click Create.
Consult checks values as they are entered on a record:
- A Number field accepts whole numbers only, and a Decimal field accepts up to two decimal places.
- A Dropdown value must be one of the configured options.
- On a Contact field, Email Address must be a full email address, including a domain such as
.com, and Phone Number and Mobile Number are entered in international format using the dial-code picker.
Edit or delete a custom field
Click the edit icon on a field’s row to change its Name, Description, Required flag, options, or contact details. The type, and the kind of record the field belongs to, cannot be changed once it is created.
Two edits affect records that already exist:
- Making a field required means a record without a value cannot be saved again until the field is filled in.
- Removing a contact detail stops it being captured, and the value already held for it on a record is discarded the next time that record is saved.
Click the delete icon to remove a field. Its values are kept, but the field no longer appears on records or in exports.
See add clients, add new users, and create a new project for where the fields are completed.
Integrations
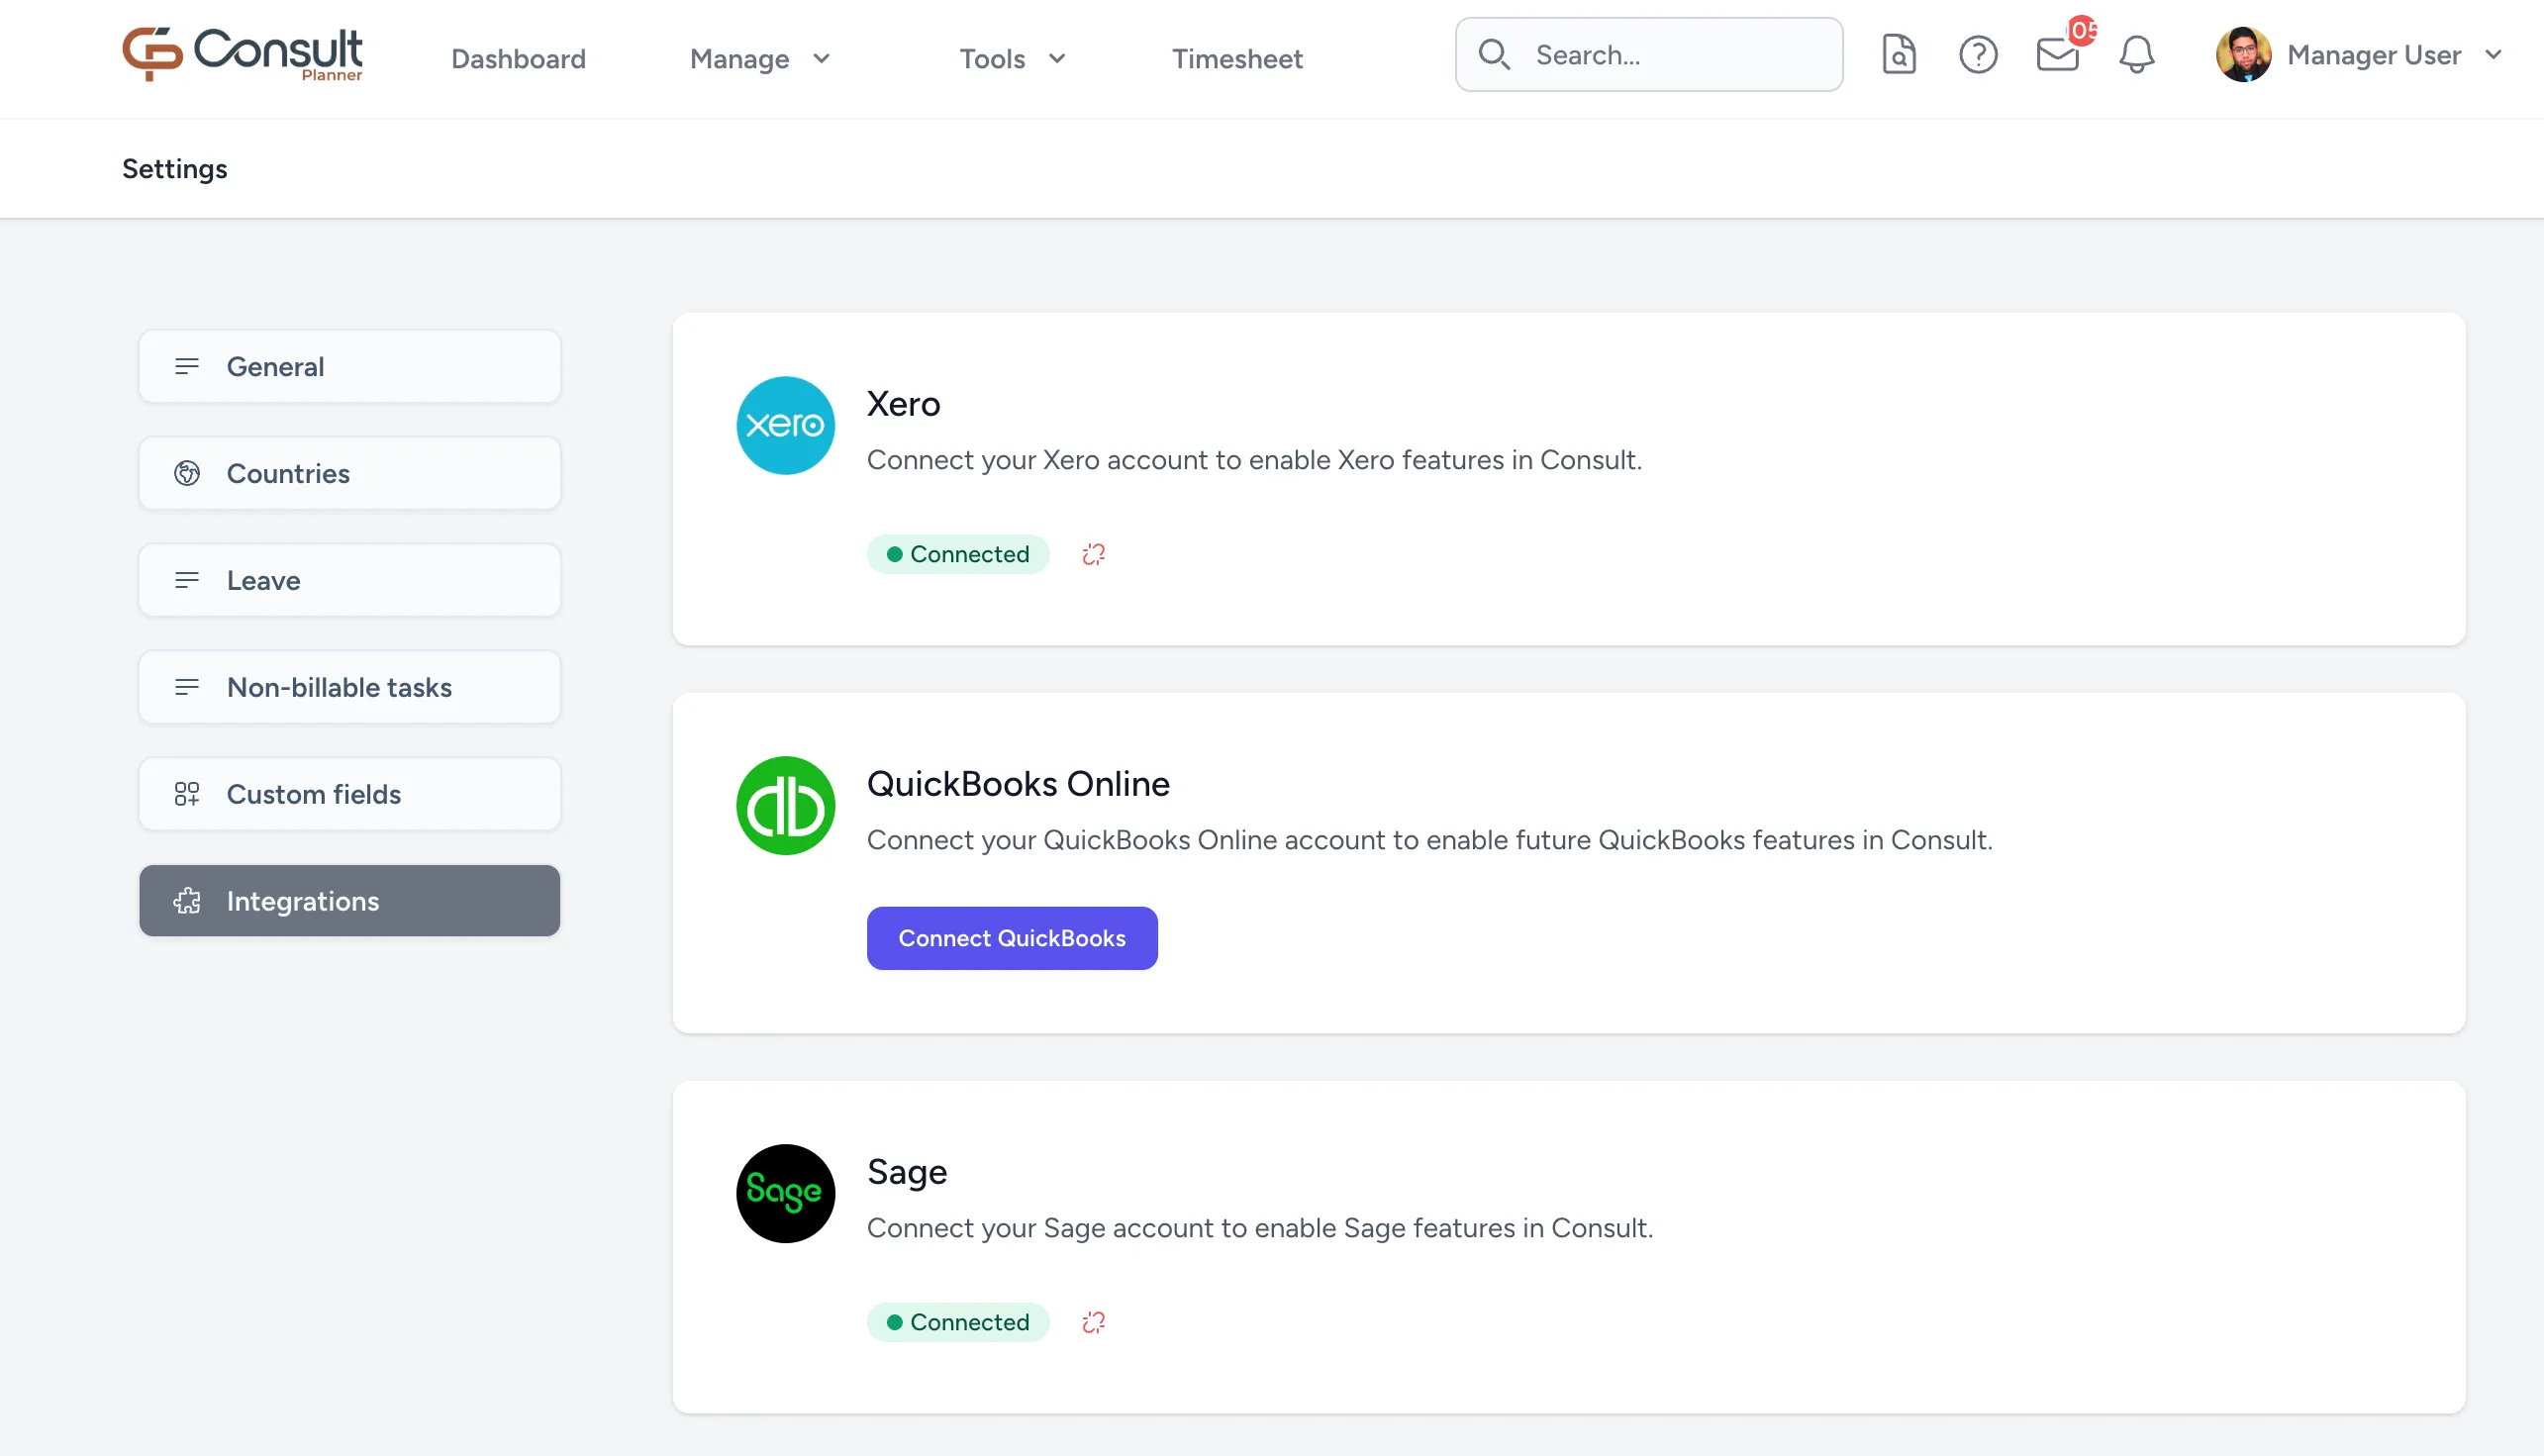
Integrate with external products to improve Consult’s usability.
To open the page, go to Admin Settings > Integrations.
Only users with Set Admin Settings as part of their role can connect or disconnect an integration.
Xero integration
Consult can connect to more than one Xero organisation, for example where each business entity keeps its own books.
To connect to Xero:
- Click Connect Xero.
- On the Xero login page, use the organisation’s Xero details to complete the form and click Log in.
- Choose the Xero organisations Consult may use, and click Allow access. This lets Consult create and read invoices and credit notes, read payments, create and read contacts, and read settings such as accounts, branding themes, and tracking categories, in each organisation allowed.
The Xero card now shows a Connected badge, with the organisations listed under Connected organisations:.
Once connected, you can manage the organisations from the same card:
- Add organisation: Runs the Xero sign-in again so that further organisations can be allowed.
- Remove: Stops Consult using an organisation for new exports, after confirming in the Remove Xero organisation dialog. Invoices already exported to it are unaffected. It is only shown when more than one organisation is connected, since the last one cannot be removed this way.
- Disconnect Xero: Removes every connected organisation and stops Consult communicating with Xero.
With Xero connected, each project gains a Xero Billing section for its invoice defaults. See Xero billing.
QuickBooks integration
To connect to QuickBooks:
- Click Connect QuickBooks.
- On the QuickBooks login page, use the organisation’s QuickBooks details to complete the form and click Sign in.
- Select the QuickBooks company account to integrate.
- Click Next. This gives QuickBooks access to the details of the invoice exported from Consult.
The status below QuickBooks should now indicate that it is Connected.
Sage integration
To connect to Sage:
- Click Connect Sage.
- Sign in with the organisation’s Sage details and allow Consult access.
- If the Sage account has more than one company, the card shows Company selection required. Choose the company to use and click Select Company. An account with a single company is selected automatically.
The Sage card now shows a Connected badge and the company in use. To disconnect, click the disconnect icon on the card and confirm.
Note: Export to Sage is only offered on invoices once a company has been selected.